Quick start guide step by step
What's in the box?
- DC39 Vacuum cleaner.
- Extension tube.
- Wand handle.
- Musclehead™ tool.
- Hose assembly.
- Accessory tools.
- User guide.
Assembling your machine
- Attach the hose to the hose inlet on the front of the machine.
- Clip the hose to the rear of the wand handle.
- Clip the wand handle to the extension tube.
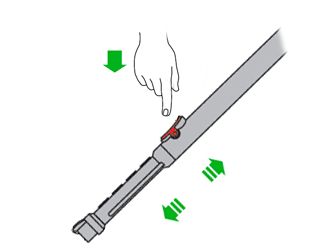
- Press the release catch on the extension tube to extend, ensuring it 'clicks' into place.
- Attach the Musclehead™ tool to the extension tube.
- Insert the tools into the holster and attach to the extension tube as shown below.

Using the Musclehead™ tool
- Push the Musclehead™ tool on to the extension tube ensuring it 'clicks' into place.

- The two red tabs on the underneath of the Musclehead™ tool can be opened to reduce the suction.

Using the extension tube
- Press the release catch on the extension tube to extend, ensuring it 'clicks' into place.
Storing the tools on the machine
- Attach the tools to the tool holster.
- Clip the tool holster to the extension tube as shown below.

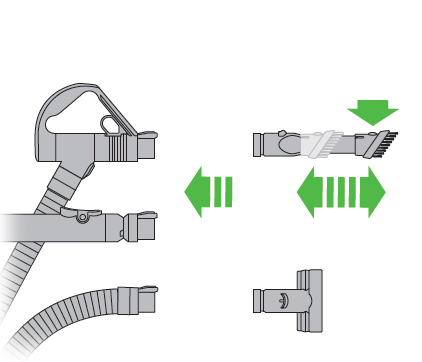
Using the accessory tools
- Attach the accessory tools to the wand handle or extension tube ensuring they 'click' into place.
- Alternatively, remove the extension tube and wand handle and attach the accessory tools directly to the hose ensuring they 'click' into place.
Emptying the clear bin
Step 1 - Removing the clear bin and cyclone
- Empty as soon as the dirt reaches the level of the MAX mark – do not overfill.
- To remove the cyclone and clear bin, push the release button to the side of the carrying handle, as shown. The carrying handle will be released. Remove the cyclone and clear bin unit.

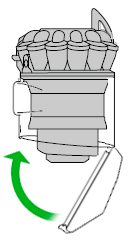
Step 2 - Emptying the bin
- To release the dirt, press the red bin release button.

Step 3 - Closing the bin base
- Close the clear bin base so it clicks into place and is secure.
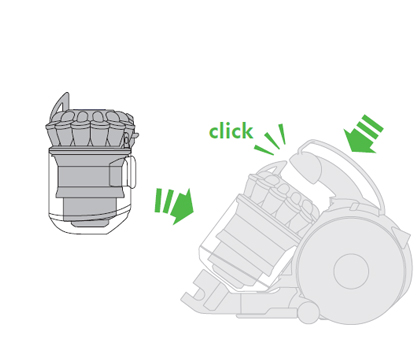
Step 4 - Replacing the bin and cyclone
- Place the clear bin and cyclone into position on the front of the main body. The recess in the base of the clear bin must fit onto the lug on the locator bracket.
- Push the carrying handle down so it clicks into place on the top of the clear bin and cyclone ensuring it is secure.
NB: To minimise dust/allergen contact when emptying, encase the clear bin tightly in a plastic bag and empty. Remove the clear bin carefully. Seal the bag tightly, dispose as normal.
Did you find this useful?