Assembling your Dyson
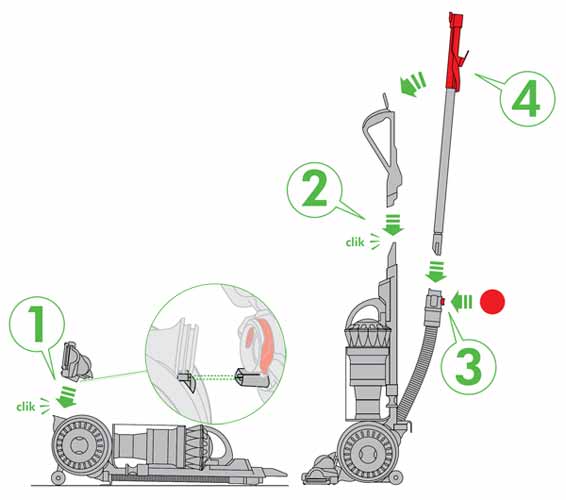
Step 1 - Assembling the machine
- Attach the cleaner head onto the base of the machine ensuring the electrical pins are aligned, as shown below.
- Attach the wand handle by sliding it on to the top of the machine until it 'clicks' into place.
- Ensure the hose is straight. Press the red button on the hose.
- Slide the end of the wand down into the hose and onto the handle to secure.
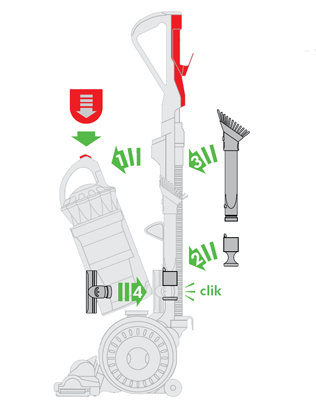
Step 2 - Attaching the accessory tools
- Remove the bin and cyclone assembly.
- Fit the tool holder onto the side of the machine ensuring that it 'clicks' into place.
- Attach the combination tool.
- Attach the stair tool.
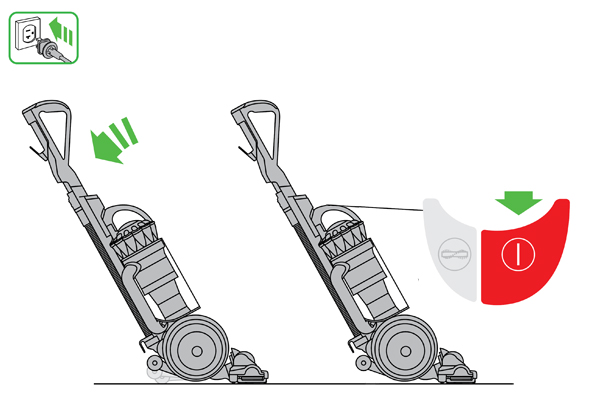
Step 3 - Start vacuuming
- Plug the machine in.
- Recline the machine into the vacuuming position.
- Ensure the stabilizing wheels are fully retracted.
- Press the ON/OFF switch.
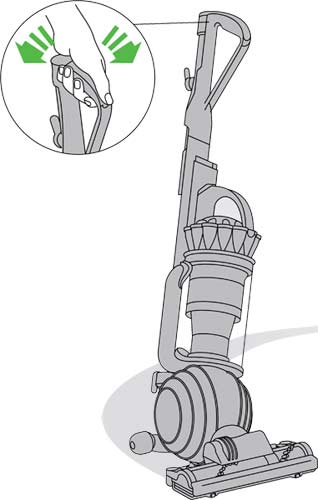
Small movements of the wrist will create a zigzag motion in the cleanerhead allowing for easier cleaning around furniture.
Step 4 - Vacuuming on different floor types
The brushbar will start automatically once the machine is switched on and lowered into the vacuum position.
- Press the brush control button located next to the ON/OFF switch to turn the brushbar off for vacumming delicate rugs, looped carpets and hard floors.
- Press the button again to restart the brushbar for vacuuming carpets.
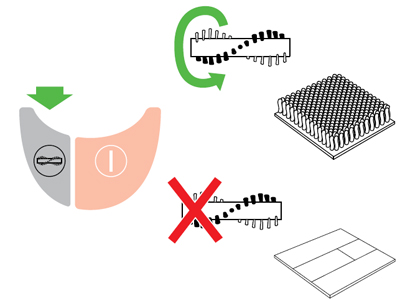
Step 5 - Using the accessory tools
- Attach either the combination tool or the stair tool to the wand or hose as shown.
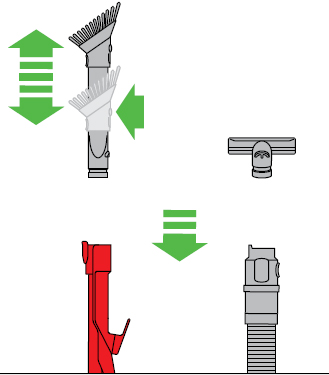
Step 6 - Emptying the clear bin
Turn power off and unplug the machine.

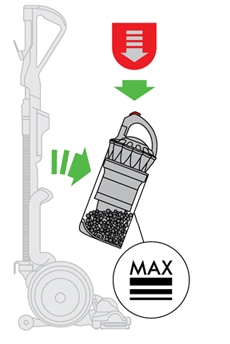
- To ensure your machine continues to clean effectively, the clear bin must be emptied as soon as the dust reaches the max mark.
- Remove the bin assembly by pressing the catch on top of the carry handle.
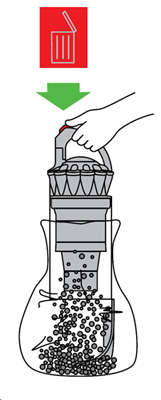
- To empty the bin press the catch on top of the carry handle again to release dust directly into a dustbin.
- Shake or tap firmly to remove all dust from inside the fine dust collector.
- Press firmly on the centre of the clear bin base to close.
Did you find this useful?