Quick start guide step by step
Step 1 - Assembling the machine.
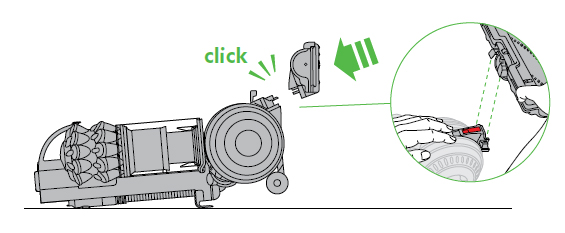
- Lay the machine on its back and fit the cleaner head onto the connections as shown below.
- Push firmly until the cleaner head clicks into place and the red latch engages.
- Stand the machine upright.
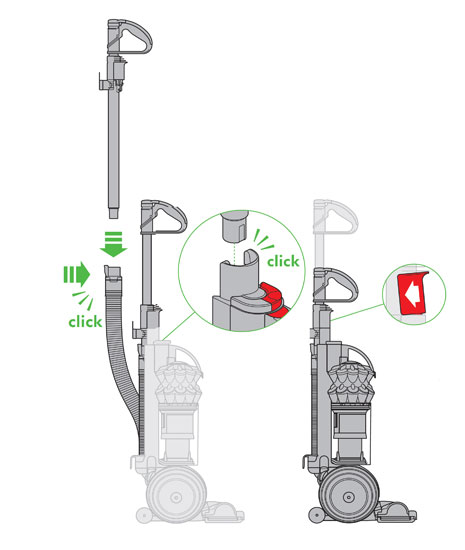
- Push the wand and handle assembly into the top of the hose until it 'clicks'.
- Press the red wand release button and push the wand fully into the hose.
- Place the wand and handle assembly into the grooves on the top of the duct as shown below.
- Press the red handle release button and push the wand and handle assembly down fully.
- To fit the tool holder, first remove the cyclone and clear bin assembly.
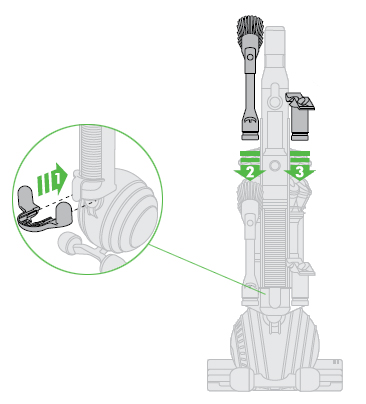
- Slide the tool holder onto the back of the machine, just above the ball, as shown below.
- Press the tool holder on with your thumbs, while holding the front of the machine with your fingers. The fitting is tight, so use a constant, firm pressure.
- Refit the cyclone and clear bin unit.
- Attach the tools.
NB: The tool holder is not designed to be removed once fitted.
Step 2 - Start vacuuming.
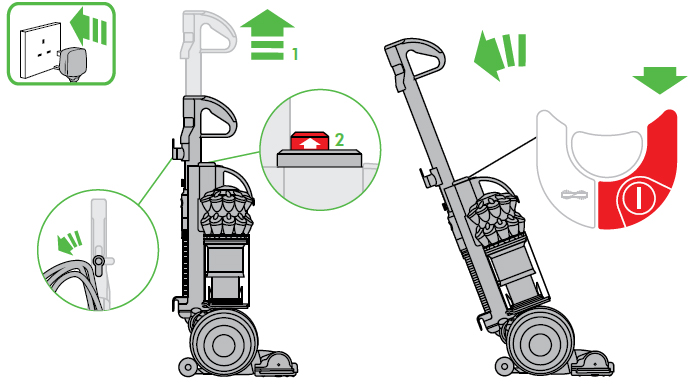
- Ensure the handle is fully extended and locked into place
- Plug the machine in.
- Recline the machine into the vacuuming position.
- Ensure the stabilizing wheels are fully retracted.
- Press the ON/OFF switch.
Step 3 - Vacuuming on different floor types.
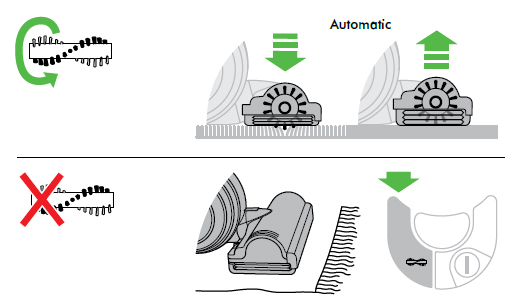
- The brushbar will start automatically once the machine is switched on and lowered into the vacuuming position.
- The brushbar will not rotate when the machine is in the upright position.
- The cleaner head adjusts automatically to all floor types, and the brush bar contains carbon fibre filaments for removing fine dust from hard floors.
- Press the brush control button located next to the ON/OFF switch to turn the brushbar off for vacuuming delicate rugs and floors.
- Press the button again to restart the brushbar.
- Some carpet manufacturers do not recommend using a vacuum cleaner with a rotating brushbar. Please refer to the carpet manufacturer but if you are unsure, we recommend vacuuming with the brushbar switched off.
Step 4 - Using the accessory tools.
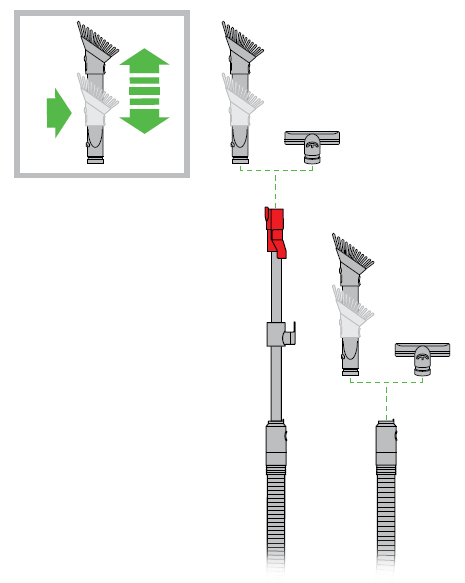
- Attach either the combination tool or the stair tool to the wand or hose as shown.
Step 5 - Emptying the clear bin.
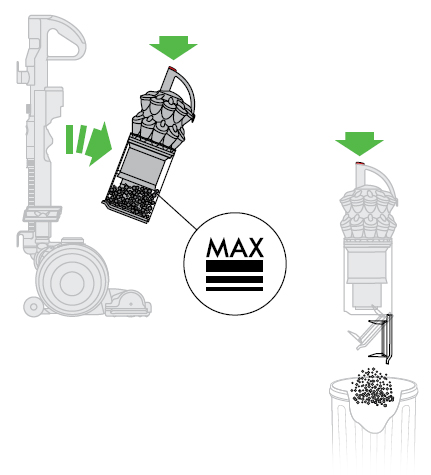
- To ensure your machine continues to clean effectively, the clear bin must be emptied as soon as the dust reaches the max mark.
- Remove the bin assembly by pressing the catch on top of the carry handle.
- To empty the bin press the catch on top of the carry handle again to release dust directly into a dustbin.
- Shake or tap firmly to remove all dust from inside the fine dust collector.
- Press firmly on the centre of the clear bin base to close.
